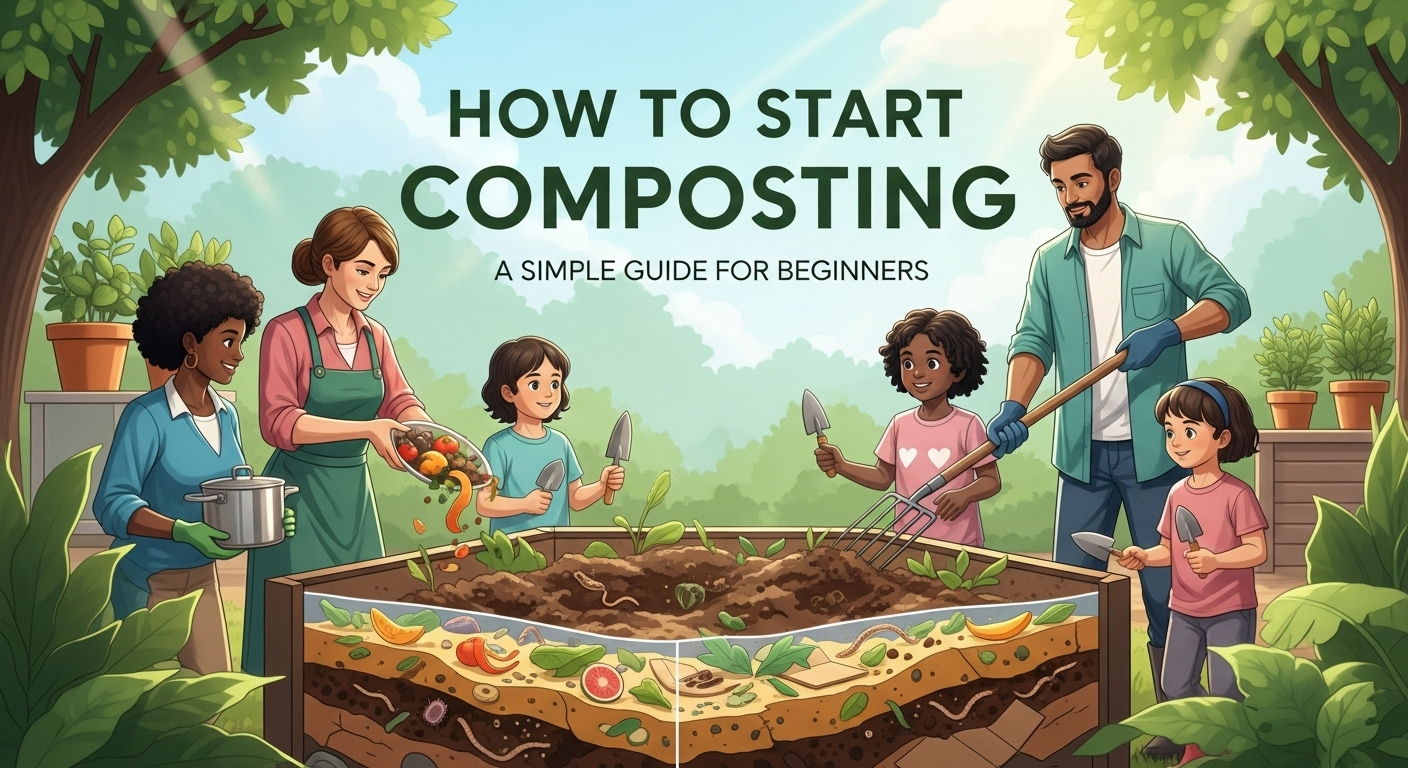
How to Start Composting: A Simple Guide for Beginners
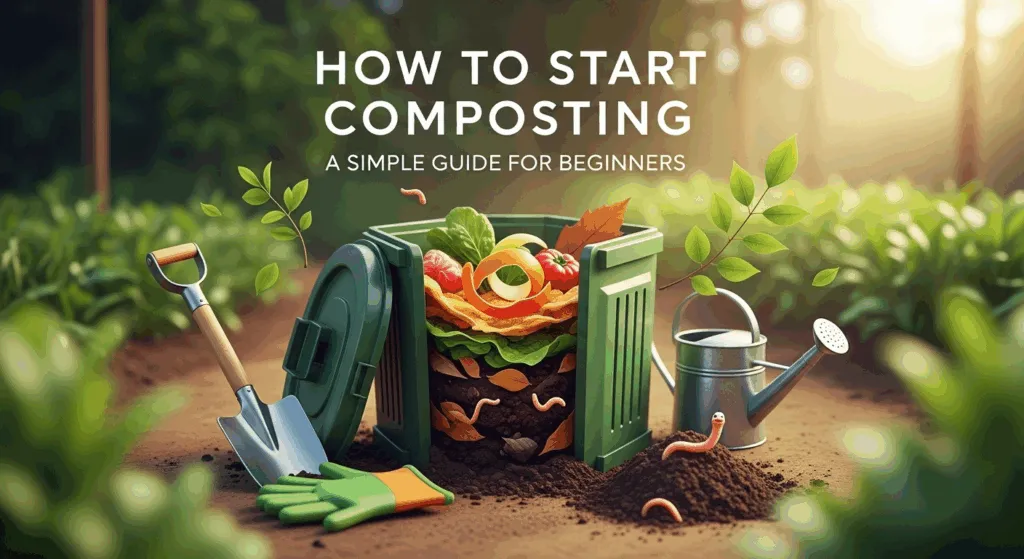
Turning your kitchen scraps and yard trimmings into nutrient-rich soil might sound like a complex scientific process, but it's one of the most rewarding and environmentally friendly habits you can adopt. Many people are intrigued by the idea of reducing their landfill waste and creating free, high-quality fertilizer for their plants, but they often feel overwhelmed by the initial setup and rules. They find themselves asking the same fundamental question: where do I even begin? This guide is designed to answer exactly that: how to start composting for beginners in the simplest way possible. We'll demystify the process, break it down into easy-to-follow steps, and give you the confidence to transform your waste into "black gold."
What is Composting and Why Should You Start?
At its core, composting is nature's recycling program. It is the natural process of decomposition, where organic materials like food scraps, leaves, and grass clippings are broken down by microorganisms (like bacteria and fungi) into a rich, dark, soil-like substance called compost. Think of it as actively managing decay in a controlled environment to produce a valuable resource. Instead of letting these materials rot in a landfill, releasing harmful methane gas, you are harnessing a natural cycle to create something beneficial. This process is happening all the time on forest floors, where fallen leaves and branches decompose to enrich the soil for new growth.
The benefits of composting are multi-faceted and impact your home, your garden, and the planet. Firstly, it drastically reduces your household waste. The U.S. Environmental Protection Agency (EPA) estimates that food scraps and yard waste make up more than 30% of what we throw away. By composting, you can divert a significant portion of this from landfills, which are a major source of methane, a potent greenhouse gas. Secondly, it creates a powerful soil amendment. Compost improves soil structure, helps it retain moisture (reducing your need to water), and suppresses plant diseases and pests. It enriches the soil with essential nutrients, eliminating the need for chemical fertilizers and saving you money.
Starting your composting journey is about understanding a few key principles, not memorizing a complicated rulebook. It’s an empowering step towards a more sustainable lifestyle that directly connects you to the food you eat and the ground it grows in. Whether you have a large backyard or a small apartment balcony, there is a composting method that will work for you. The satisfaction of harvesting your first batch of dark, crumbly compost and seeing your plants thrive is a powerful motivator. This guide will walk you through every step, from the basic ingredients to troubleshooting, ensuring your first foray into composting is a resounding success.
The Core Ingredients: Balancing Your Greens and Browns
The secret to successful, odor-free composting lies in creating the right environment for the microorganisms to do their work. These tiny helpers need a balanced diet, which consists of two main categories of materials: "Greens" and "Browns." Getting this balance right is the most critical aspect of learning how to compost. An imbalance is the root cause of most common composting problems, like a smelly pile or one that simply won't break down.
Think of it like building a fire. The "Browns" are the logs (the fuel), and the "Greens" are the kindling and match (the ignition). You need a lot of fuel and just enough ignition to get things going and keep them burning steadily. In composting, the "Browns" provide carbon for energy, while the "Greens" provide the nitrogen needed for microorganism growth and reproduction. A healthy compost pile needs a much higher ratio of carbon to nitrogen to function optimally.
A good rule of thumb for beginners is to aim for a ratio of 2 to 3 parts "Browns" to 1 part "Greens" by volume. Don't get too caught up in precise measurements; this is more of an art than an exact science. If you add a bucket of kitchen scraps (Greens), aim to add two or three buckets of dried leaves or shredded cardboard (Browns). This balance ensures your pile has enough energy, enough protein for the microbes, and enough structure to allow for air circulation, which is vital for the aerobic (oxygen-using) bacteria that are the most efficient decomposers.
Understanding "Greens" (Nitrogen-Rich Materials)
“Greens” are the fresh, moist materials that are rich in nitrogen. These are the “activators” of your compost pile. They provide the protein and moisture that the microorganisms need to multiply and heat up the pile. When you think of “Greens,” think of things that were recently alive and are often, but not always, green in color. These materials tend to decompose quickly and can become smelly if not balanced with enough “Browns.”
Common sources of "Green" materials include:
- Fruit and vegetable scraps (peels, cores, rinds)
- Coffee grounds and used tea bags
- Fresh grass clippings
- Eggshells (crushed for faster breakdown)
- Houseplant trimmings
- Weeds (that haven't gone to seed)
It's helpful to keep a small, lidded container in your kitchen to collect these scraps throughout the day. When you take them out to your main compost pile, always remember to add a healthy layer of "Browns" on top to maintain the balance and prevent odors and pests.
Understanding "Browns" (Carbon-Rich Materials)
“Browns” are the dry, woody, or fibrous materials that are rich in carbon. These are the “bulk” of your compost pile. They provide the long-term energy source for the microorganisms. More importantly, their coarse and bulky nature creates air pockets within the pile, which is crucial for providing the oxygen that aerobic decomposers need to thrive. Without enough “Browns,” a compost pile will become a dense, wet, and anaerobic (oxygen-starved) mess, leading to a foul, sour smell.
Common sources of "Brown" materials include:
- Dried leaves
- Shredded cardboard and newspaper (avoid glossy paper)
- Twigs and small branches
- Sawdust and wood chips (from untreated wood)
- Pine needles
- Straw or hay
- Paper towel rolls and egg cartons
It's a great idea to stockpile "Browns". In the fall, when leaves are abundant, gather them in bags and keep them near your compost bin. Throughout the year, you can shred a steady supply of non-glossy junk mail, cardboard boxes, and paper bags to have on hand whenever you add "Greens."
The Ideal Carbon-to-Nitrogen (C:N) Ratio
While the 3:1 volume rule is a great practical guide, the science behind it is the carbon-to-nitrogen (C:N) ratio. Different materials have vastly different C:N ratios. For example, sawdust is extremely high in carbon (500:1), while vegetable scraps are much lower (15:1). The ideal C:N ratio for an active compost pile is around 30:1. This is the sweet spot that provides the perfect diet for the decomposer microorganisms.
You don't need a calculator to succeed. The simple act of adding significantly more "Browns" than "Greens" will naturally get you close to this ideal ratio. The table below provides a quick reference to help you better understand the materials you are adding and why balancing them is so important.
| Material Category | Role in Compost | Examples | C:N Ratio (Approximate) |
|---|---|---|---|
| "Greens" | Nitrogen Source (Activator) | Vegetable Scraps, Coffee Grounds, Grass Clippings, Manure | 15:1 to 25:1 |
| "Browns" | Carbon Source (Bulk/Energy) | Dried Leaves, Cardboard, Twigs, Sawdust, Straw | 40:1 to 500:1 |
| Ideal Pile Mix | Balanced Diet for Microbes | A mix of the above, aiming for a 30:1 average | ~30:1 |
Remember, if your pile smells bad (like ammonia or rotten eggs), it's a clear sign you have too many "Greens" or not enough air. The simple fix is to add more "Browns" and turn the pile to aerate it. If your pile is not breaking down, it may be too dry or have too many "Browns." The fix is to add "Greens" or a small amount of water.
Choosing Your Composting Method
Once you understand the basic ingredients, the next step is to decide how you want to compost. The best method for you will depend on your available space, the amount of time and effort you want to invest, and how quickly you want to see results. There is no single "right" way to do it; the goal is to choose a system that fits your lifestyle. For beginners, it's best to start with a straightforward method and then explore others as you gain confidence.
From a simple, slow-and-steady pile in the corner of your yard to a dedicated worm bin under your sink, a variety of options exist. We will cover the most popular methods for beginners, highlighting their pros and cons. Consider your own situation: do you have a large yard with plenty of leaves and grass clippings, or are you in an apartment with only kitchen scraps to contribute? Your answer will guide you to the perfect starting point.
Cold Composting (The "No-Fuss" Method)
Cold composting, also known as passive composting, is by far the easiest method and a perfect entry point for beginners. It’s an “add-as-you-go” approach that requires minimal effort. You simply create a pile or fill a bin with your organic waste (remembering the Green/Brown balance) and let nature take its course. There’s no need for regular turning or temperature monitoring. You can start with an open pile or use a simple containment system like a circle of wire fencing or a store-bought bin.
The major advantage of cold composting is its simplicity. It's forgiving and requires very little time commitment. However, the trade-off is speed. A cold compost pile can take a year or more to produce finished compost because it doesn't build up the high temperatures needed for rapid decomposition. Additionally, because the pile doesn't get hot, weed seeds and plant pathogens may not be killed off. This method is ideal for those who are patient, have a steady supply of yard waste, and are primarily looking for a simple way to divert waste from the landfill.
Hot Composting (The "Fast" Method)
Hot composting is a more active, hands-on approach that yields finished compost much more quickly—often in as little as 4 to 8 weeks. This method is designed to cultivate a large population of thermophilic (heat-loving) microorganisms. These microbes work so furiously that they raise the internal temperature of the pile to 130-160°F (55-70°C). This intense heat rapidly breaks down materials and has the added benefit of killing most weed seeds and plant pathogens.
To achieve these temperatures, a hot compost pile needs a critical mass—ideally, a pile that is at least 3 feet by 3 feet by 3 feet (1 cubic meter). It also requires careful attention to the C:N ratio, moisture levels, and, most importantly, regular aeration. You will need to turn the pile with a pitchfork or compost aerator every few days to a week to keep it oxygenated and distribute the heat and moisture evenly. Hot composting is perfect for the enthusiastic gardener who wants high-quality compost quickly and doesn't mind the physical effort.
Vermicomposting (Worm Composting)
What if you don’t have a yard? Vermicomposting is the solution. This method uses a specific type of earthworm, most commonly Red Wigglers (Eisenia fetida), to process your food scraps in a contained bin. It’s a highly efficient, odor-free system that can be kept indoors, such as under a sink, in a closet, or on a balcony. The worms eat the food scraps and bedding material (like shredded newspaper) and excrete nutrient-rich “castings,” which are one of the most prized soil amendments in the world.
A worm bin is a self-contained ecosystem. You start with a bin, add moist bedding, introduce the worms, and then begin adding small amounts of food scraps. The worms do all the work of turning and aerating. This method is ideal for apartment dwellers and those who primarily produce kitchen waste rather than yard waste. It produces a smaller volume of finished compost compared to outdoor piles, but the quality of the worm castings is exceptionally high. It's crucial not to add meat, dairy, or oily foods, as these can cause odors and harm the worms.
Setting Up Your First Compost System: A Step-by-Step Guide
With a grasp of the ingredients and methods, it's time for the exciting part: setting up your system. This is where the theory becomes practice. Don't aim for perfection on your first try; the goal is to get started. The process is forgiving, and you can always make adjustments along the way. We’ll walk through the practical steps of choosing a spot, getting a bin, and building your first pile.
This initial setup is a one-time effort that paves the way for a simple, ongoing routine. Taking the time to select a good location and build your first pile with the right layers will significantly increase your chances of success and make future maintenance much easier. Remember the lasagna analogy: you're just layering different ingredients to create something delicious for your garden.
Selecting a Location
The location of your compost pile or bin is more important than you might think. A well-placed bin is convenient to use and more likely to thrive. Look for a spot that is partially sunny and partially shady. A bit of sun can help heat the pile, but too much direct sun can dry it out too quickly. Full shade is also fine, though the decomposition process might be a little slower.
Also, consider convenience and access. Place your bin in a spot that is easy to get to from your kitchen, as you'll be taking out food scraps regularly. Ensure there is enough space around the bin to work, especially if you are hot composting and need to turn the pile. Finally, make sure it's near a water source, like a garden hose. A compost pile needs to be kept as moist as a wrung-out sponge, so you'll occasionally need to add water, especially during dry periods. Avoid placing it directly against a wooden fence or building, as the constant moisture can cause rot over time.
Choosing or Building a Bin
You don’t technically need a bin to compost; you can simply create a heap on the ground. However, a bin helps keep the pile tidy, retains heat and moisture, and can deter critters. There are many options, from commercial products to DIY solutions.
- Stationary Bins: These are typically large, plastic bins (often made from recycled plastic) with a lid on top and a door at the bottom for harvesting finished compost. They are great for passive, cold composting.
- Compost Tumblers: These are sealed drums mounted on an axle with a handle. To aerate the compost, you simply turn the handle to rotate the drum. They are clean, pest-resistant, and great for faster (hot) composting, though their capacity is often smaller.
- DIY Bins: For those on a budget or with a lot of yard waste, a DIY bin is an excellent choice. A simple and effective design involves creating a three-sided enclosure using wooden pallets stood on their edge and wired together. This is a cheap, large-capacity option perfect for hot composting. You can also create an enclosure with wire mesh.
The best choice depends on your budget, space, and how hands-on you want to be. For a true beginner, a stationary bin or a tumbler is often the easiest, most self-contained starting point.
Layering Your Compost Pile for Success
This is the moment of creation. Building your first compost pile is like making a lasagna. You’ll be alternating layers of “Browns” and “Greens” to create the perfect environment for decomposition.
- Start with the Base Layer (Browns): Begin with a thick layer (4-6 inches) of coarse "Brown" materials at the bottom of your bin or pile. This includes things like twigs, small branches, and crumpled cardboard. This initial layer is crucial for promoting airflow and drainage from the bottom.
- Add a Layer of Greens: Next, add a layer of your "Green" materials, such as kitchen scraps and fresh grass clippings. This layer should be thinner than your brown layer.
- Add Another Layer of Browns: Cover the green layer completely with another layer of "Browns," like dried leaves or shredded newspaper. This is a critical step to prevent odors and deter pests. Food scraps should never be the top layer.
- Lightly Water: Sprinkle a little water on the layers as you go. The goal is to make the pile moist, not soaking wet. Aim for the consistency of a damp sponge.
- Repeat: Continue alternating layers of Greens and Browns, finishing with a final layer of Browns on top. If you have a nitrogen-rich activator like manure, you can sprinkle a thin layer in between to help kickstart the process.
Once your pile is built, all you have to do is let the microorganisms begin their work. Don't be surprised if you see steam rising from the center of the pile after a few days—that's a sign that you've created a happy home for them!
Maintaining Your Compost and Troubleshooting Common Problems
Once your compost pile is established, the maintenance phase begins. For cold composting, this involves little more than continuing to add materials and waiting. For hot composting, it requires a bit more attention to keep the process moving quickly. The good news is that a compost pile is resilient. Most problems that arise are easy to diagnose and even easier to fix.
Understanding how to maintain proper moisture and aeration is key. Think of yourself as the manager of a microscopic workforce. Your job is to ensure they have the oxygen and water they need to do their job efficiently. Learning to spot the early warning signs of an imbalanced pile will give you the confidence to manage any issue that comes your way.
Keeping Your Compost Healthy
A healthy compost pile is an active ecosystem that requires two main inputs from you: air and water. Without these, the beneficial aerobic microorganisms will die off, and the slow, smelly anaerobic ones will take over.
- Aeration (Turning the Pile): This is the process of mixing your compost to introduce oxygen. For hot composting, this is essential and should be done every 4-7 days. Use a pitchfork or a compost aerator tool to move material from the outside of the pile to the center, and from the center to the outside. This re-energizes the microbes, distributes heat and moisture, and breaks up any compacted clumps. For cold composting, turning isn't strictly necessary, but mixing the pile once a month or so will speed things up.
- Moisture Management: Your compost pile should feel like a wrung-out sponge. If you squeeze a handful, only a drop or two of water should come out. If it's too dry, the decomposition will slow to a crawl. Use a hose to add water as you turn it. If it’s too wet (often from too many "Greens" or heavy rain), it will go anaerobic and smell sour. The solution is to add a large amount of dry "Brown" materials and turn the pile thoroughly to absorb the excess moisture and create air pockets.
Solving Common Compost Issues
Every beginner encounters a few hiccups. Don’t be discouraged! These are learning opportunities. Here are the most common problems and their simple solutions:
- Problem: The compost pile has a bad odor (smells like rotten eggs or ammonia).
- Cause: The pile is anaerobic. This is usually caused by either too much moisture (too many "Greens," too much water) or compaction (not enough air). An ammonia smell specifically points to too much nitrogen ("Greens").
- Solution: Add more "Browns"! Mix in a generous amount of dried leaves, shredded cardboard, or sawdust. Turn the pile thoroughly to introduce oxygen and break up any wet clumps.
- Problem: The pile is not heating up.
- Cause: There are three likely culprits: the pile is too small, it's too dry, or it doesn't have enough "Greens" (nitrogen).
- Solution: First, check the moisture and add water if it's dry. If that doesn't work, add a fresh source of "Greens" like grass clippings or coffee grounds to give the microbes a nitrogen boost. If you're trying to hot compost, make sure your pile is at least 3x3x3 feet to retain heat.
- Problem: The pile is attracting pests (rodents, raccoons).
- Cause: Exposed food scraps are an open invitation. Pests are also attracted to meat, dairy, and oily foods.
- Solution: Never compost meat, bones, or dairy products in a standard home compost pile. Always bury your fresh kitchen scraps deep within the center of the pile and cover them with a thick layer of "Browns." Using a secure, lidded bin or a tumbler can also help keep pests out.
- Problem: The pile is attracting flies.
- Cause: This is almost always due to exposed food scraps, especially fruit waste.
- Solution: Similar to preventing pests, always cover your kitchen scraps immediately with a layer of "Browns." A 2-3 inch layer of leaves or shredded paper is usually sufficient to keep flies from laying their eggs.
Frequently Asked Questions (FAQ) About Composting
Q: What materials should I absolutely NOT put in my compost pile?
A: For a standard backyard pile, you should avoid meat, fish, bones, dairy products (milk, cheese, yogurt), and oily or greasy foods. These materials can create foul odors and attract pests like rodents and raccoons. You should also avoid pet waste (from cats or dogs) as it can contain harmful pathogens. Finally, don't add diseased plants, as a cold compost pile may not get hot enough to kill the pathogens, potentially spreading them back to your garden.
Q: How long does it take to get finished compost?
A: This depends entirely on your method. With hot composting, which involves active management (turning, watering), you can have finished compost in as little as 4-12 weeks. With cold composting, where you simply add materials and let them be, it can take 6 months to 2 years. Vermicomposting (worm composting) typically produces finished castings within 3-6 months.
Q: Do I need a big yard to compost?
A: Not at all! While a large yard is great for a hot composting pile, there are many options for smaller spaces. A stationary bin or a compost tumbler has a small footprint suitable for a small yard or patio. For those with no outdoor space at all, vermicomposting (worm composting) is a perfect indoor solution that can be kept in a kitchen, closet, or on a balcony.
Q: Will my compost pile be smelly?
A: A healthy compost pile should not smell bad. It should have a pleasant, earthy scent like a forest floor. If your pile smells foul (like ammonia or rotten eggs), it's a sign that something is unbalanced. This is almost always caused by too many "Green" materials and not enough "Brown" materials, or a lack of oxygen. The fix is simple: add more "Browns" (like dry leaves or shredded cardboard) and turn the pile to aerate it.
Q: Can I still compost during the winter?
A: Yes, you can! Your compost pile's activity will slow down significantly or even go dormant in freezing temperatures, but the microorganisms are still there. You can continue adding your kitchen scraps throughout the winter. Just be sure to keep a stockpile of "Browns" nearby to layer with. When spring arrives and temperatures rise, the pile will thaw out and decomposition will resume with vigor.
Your Composting Journey Begins Now
Embarking on the path to composting is a simple yet profound act that benefits you, your garden, and the planet. We've journeyed from understanding the "why" to mastering the "how," demystifying the balance of "Greens" and "Browns," exploring different methods, and learning how to troubleshoot with confidence. The process is not about achieving perfection, but about participating in a natural cycle. You are not just getting rid of waste; you are creating a valuable resource, "black gold," that will breathe life back into your soil.
Don't be intimidated by the science. At its heart, composting is about layering organic matter and letting nature do its work. Start small, choose a method that fits your life, and be patient. Whether you build a simple pile in your yard or start a worm bin under your sink, you are taking a tangible step towards a more sustainable and connected way of living. So gather your kitchen scraps, collect some dry leaves, and begin your composting adventure today. Your future garden will thank you for it.
***
Article Summary
This comprehensive guide, "How to Start Composting: A Simple Guide for Beginners," provides a complete roadmap for anyone looking to begin composting. The article demystifies the process by breaking it down into manageable steps. It starts by explaining what composting is—nature's recycling process—and details its key benefits, such as reducing landfill waste and creating nutrient-rich soil amendment.
The core of the guide focuses on the most critical principle for success: balancing "Greens" (nitrogen-rich materials like food scraps) and "Browns" (carbon-rich materials like leaves and cardboard), recommending a 3:1 Brown-to-Green ratio by volume. It then outlines various composting methods suitable for different lifestyles, including low-effort Cold Composting, faster Hot Composting, and space-saving Vermicomposting (worm bins) for apartments. A step-by-step section walks the reader through selecting a location, choosing a bin, and building their first layered pile. Finally, the article provides essential maintenance tips on aeration and moisture, a troubleshooting guide for common issues like bad odors and pests, and a detailed FAQ section to answer pressing beginner questions. The guide concludes with an encouraging message, empowering readers to start their journey and turn their waste into valuable "black gold" for their gardens.
